How to automatically update TeamViewer to the new version
Auto update TeamViewer
On a monthly basis, TeamViewer software will provide new updates to increase security, performance, and user experience. By updating TeamViewer to the new version automatically on your personal and remote devices, you can easily use TeamViewer with the latest features.
As a software that supports fast and secure remote computer connection, TeamView needs to be automatically updated to be able to use all available features. This will be done through the steps of checking the TeamViewer version and enabling automatic TeamViewer updates in the software's driver.
Normally, to update TeamViewer to a new version, you can choose to disable automatic updates of TeamViewer and update it manually, or enable automatic updates in the driver.
Step 1: Launch TeamViewer software on the computer.
Step 2: How to check the version of Teamviewer in use.

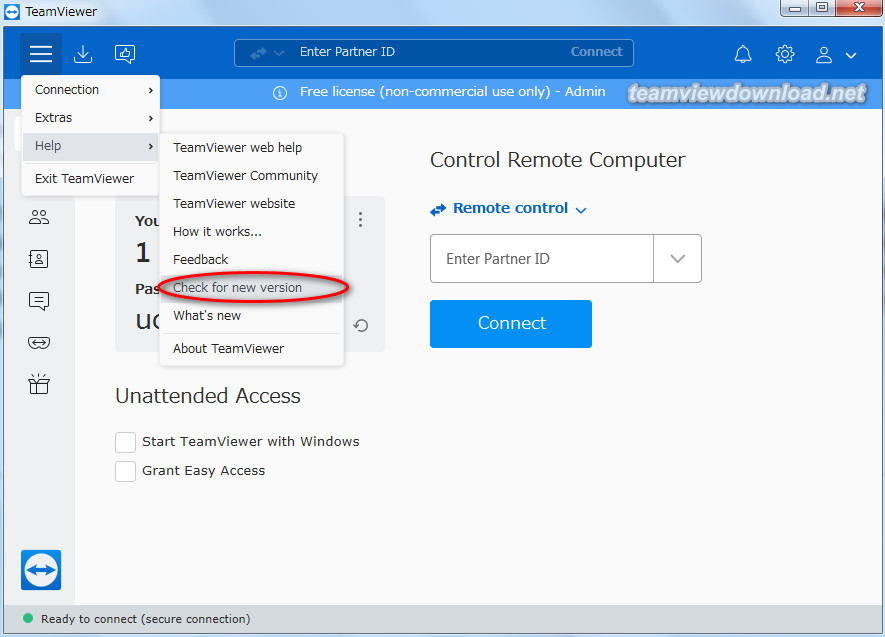
Check new version
At TeamViewer's working interface, click on the Menu icon on the top left of the screen, select "help" and then continue to select "check for new version". At this point, the screen will display the latest version of TeamViewer and suggest whether you need to update the new TeamViewer version or not.
Step 3: Go back to TeamViewer's main screen interface, click on the settings icon
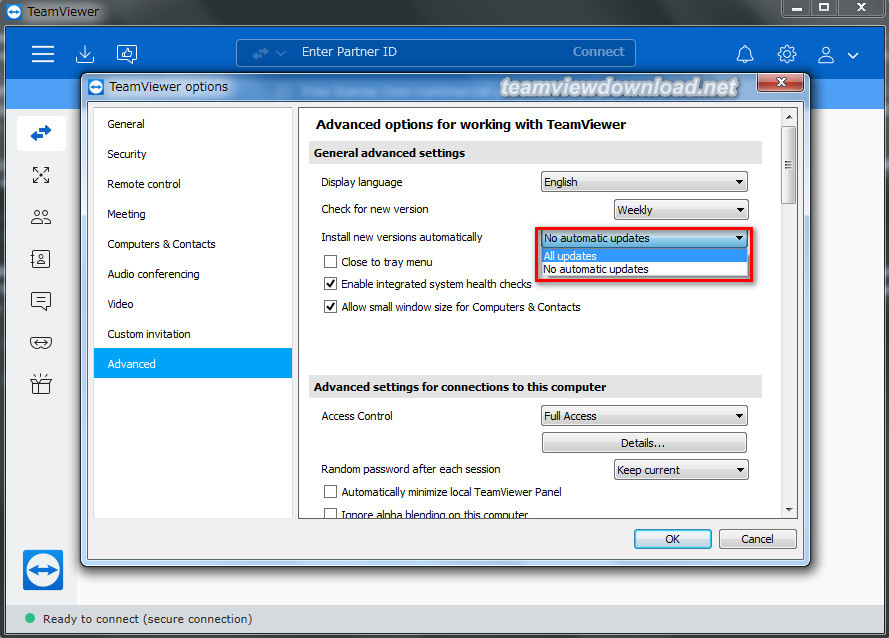
Step 4: Click on the "Advanced" option.

Advanced options
Step 5: Select the "All updates" feature in the "Install new versions automatically" section and then click "OK" to finish the installation of TeamViewer updates.

Automatically update TeamViewer setting
Above are details on how to update TeamViewer to the new version automatically quickly and easily. You can refer and practice to be able to use the latest TeamViewer features on your devices or refer to the details of How to install TeamViewer here.